
Pressed Flower Kids Craft: Turn Old Bouquets into Beautiful Keepsake Art
- Oct 8, 2025
- 2 min read
Updated: Oct 14, 2025
If you’ve ever had a bouquet that felt too special to toss — maybe from Mother’s Day, a birthday, or just a “thinking of you” surprise — this easy pressed flower craft is the sweetest way to give those blooms a second life. It’s part science, part art, and completely kid-friendly.
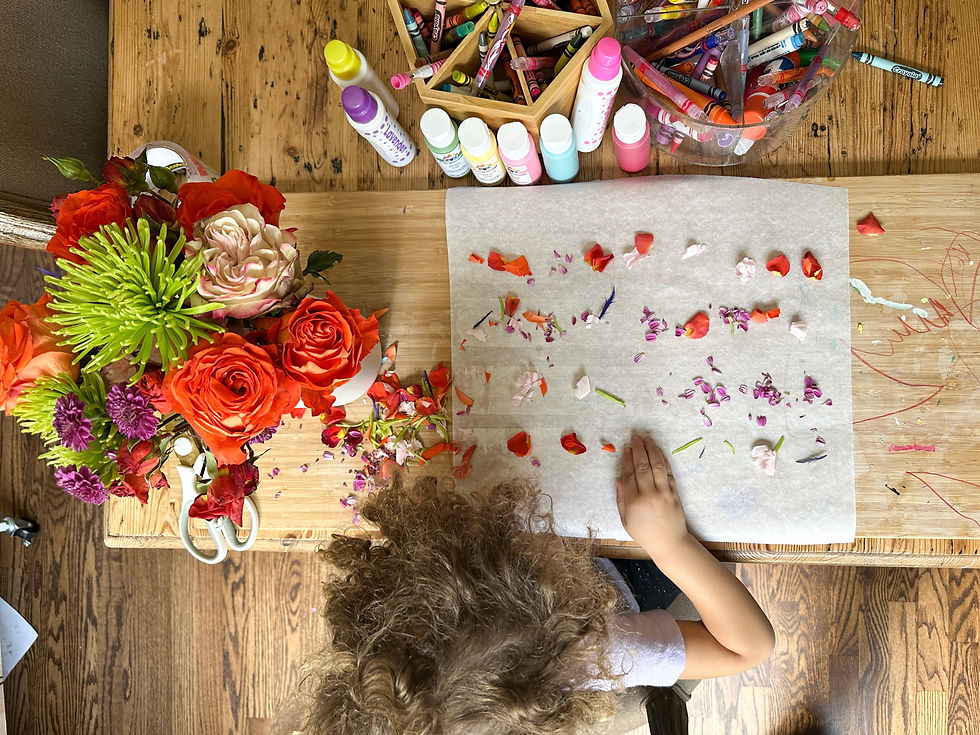
In our house, we turned a fading flower arrangement into a morning of creativity, laughter, and (a little bit of) mess — and the result was a handmade piece of art we’ll keep forever.
What You’ll Need
Fresh or wilting flowers (bouquets, wildflowers, or ones from your yard) Pro tip: letting the petals dry a bit first will help with longevity
Scissors
Parchment paper or wax paper
Clear packing tape
Cardstock or thick paper
Crayons, markers, or colored pencils for drawing stems and vases
Step-by-Step Instructions
Gather and prep your flowers
Have your little one help snip petals, stems, and small blossoms into manageable pieces. Encourage them to notice the colors, shapes, and textures — it’s a great sensory activity.
Set your first tape layer
Lay out a sheet of parchment paper on your table. Set some clear packing tape down in several rows with the sticky side down. This will the the base of your sticker.
Arrange the petals
Arrange your petals and stems in fun designs — we created loose “bouquets,” but you can do rainbows, hearts, or even abstract art.
Press and seal
Place another piece of packing tape on top of each row, sandwiching your flowers between the two pieces. Let the kids press everything together really well!
Cut out shapes
Once pressed, cut your flower sheets into smaller pieces — we just tried to keep the flower shape but made sure to have room between the flower and edge. These become your pressed flower “stickers.”
Create your masterpiece
Draw a vase or basket on a piece of cardstock, then use your pressed flower pieces to build a bouquet on top. Arrange, glue down, and add any extra doodles or decorations your child dreams up.
🌷 Display & Preserve
Hang your artwork on a wall or clip it to a string for a rotating gallery display. You can even laminate it to keep it looking fresh for years.
We made ours into a “Mother’s Day 2025” keepsake, complete with kid scribbles (signatures) and colorful blooms — the perfect reminder of messy hands, big imaginations, and a table full of color.

Why We Love This Craft
Encourages creativity and fine motor skills
Teaches kids about nature and color
Repurposes old flowers (no waste!)
Makes a meaningful, handmade gift
Final Tip
Don’t stress the mess — the more scattered petals and marker marks, the better. It’s all part of the magic of making something beautiful together.


Comments