
How To: Paint Your Banister
- Oct 21, 2025
- 2 min read

If there is one space in the house that gets ignored until you suddenly can’t stand looking at it anymore… it’s the entryway. Two years ago, ours had been patiently waiting for its glow-up and while we had BIG plans coming (like removing that awful carpet), we needed a quick and affordable “phase one” that would make the space feel intentional in the meantime. Also, I was super pregnant and we had approximately $100 to spare.
So I did what any budget-friendly homeMAKER would do: I added drama for under $100 — by painting the banister.
Why the banister?
Because in a small or simple entry, you want one visual anchor — something that makes the space feel “designed” instead of “unfinished.” Our stairs are the first thing you see, but even though the entryway is somewhat “grand”, the staircase kind of just blended in. When the budget is low and you don’t have a ton of tools or time to spare, the first thing you should reach for is paint!
What I Used
Sherwin-Williams Multi-Purpose Primer
We had it tinted a dark grey instead of white — trust me, this matters. When you’re painting wood dark, a tinted primer means fewer coats, better coverage, and a smoother final finish.
Sherwin-Williams Urethane Trim Enamel in Tricorn Black
This stuff dries hard like factory trim, doesn’t need a top coat, and fully cures in about 30 days. It’s durable, wipeable, and gives that “custom woodwork” look without needing a professional. I love that you can still see the woodgrain through it so it doesn’t give that “globbed in paint” appearance. I only used a quart for this whole project!
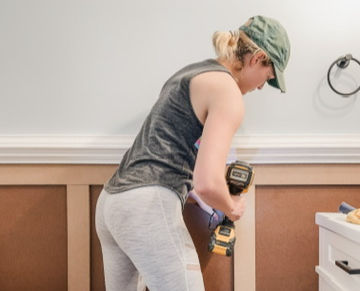
The Process (nothing fancy — just done right)
1. Rough sand all exposed wood
You’re not trying to make it baby-smooth — just break the sheen so the primer can grip. I would also recommend a quick swipe of degreaser before sanding.
2. Prime
Don’t skip it. Ever. Especially when painting on wood that was previously top-coated.
3. Paint at least 2 coats
Work in very thin coats, you don’t want any dripping. I know it feels like a heavier application will save you a coat, but I can assure you it will not. Let the first coat fully dry before the second. Urethane enamel levels beautifully if you don’t overwork it.
The Results
This one small change immediately grounded the space, highlighted the architecture that was already there, and bought us time while we planned the rest of the entryway makeover. It feels dramatic, intentional, and custom — for less than $100 and a single afternoon of work.
I initially only painted the banister but eventually went back and painted the spindles as well! It’s totally a personal choice but the process is the exact same.


If you’ve been waiting for a sign to do a little “phase one” in your own entry — here it is. Paint is still the fastest way to make a home feel more designed, even when you’re not “done” yet.


Comments